Qslip - User Guide - Importing from QuickBooks Online
Prior to exporting from QuickBooks Online
|
1. Enter Bank Numbers in Memo (optional): When receiving checks, enter the Bank Number from the checks in the memo field in the "Receive Payments" or "Sales Receipt" screens.
Qslip will read this from the QB export file. (This feature can be disabled in preferences)
If you have the customer list feature enabled in Qslip, you can skip entering the bank number here if the customer (and bank number) are in Qslip's customer list.
A stay-on-top customer list viewer (QSviewer) is included with Qslip. It can be handy to keep it open while entering payments received in QBooks -- a quick glance will let you know whether you can skip entering the bank number for a customer.
|
|
2. Enter other memo text (optional): If you have other info that you wish to place in the memo field, place it after the Bank Number, separated by a comma.
Qslip will read the Bank Number from the QB export file, placing the text after the comma into Qslip's Memo field.
If you are not entering a bank number, place a comma before any memo text you wish to enter.
Examples:
- 16-24, memo with bank number
- ,memo without bank number
|
3. Handle Split Checks (optional): If you need to assign a single check to more than one payment received transaction, preface the Check Number with a "p" character (eg. p23081) each time it is entered. Qslip will combine the separate transactions into one check item for the deposit. (This feature can be disabled in preferences)
Export from QuickBooks Online
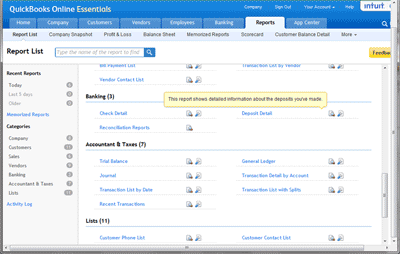
You cannot create a deposit information file directly from the "Banking | Deposit" screen. First create your deposit there, then run a customized Deposit Detail report, export it to Excel, save to a comma-separated (CSV) file from Excel, and open that file in Qslip.
Modify Deposit Report
|
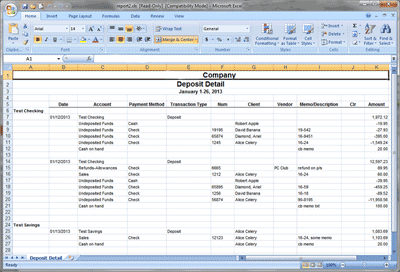
The default Deposit Detail report must be modified to include additional information (columns), which you can save for future use -- so this is a one-time only operation.
To create a customized report:
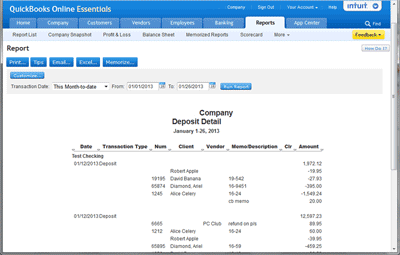
- Run the default Deposit Detail report.
|
- Change "Transaction Date:" to "Today" (optional)
- Click the "Customize..." button.
|
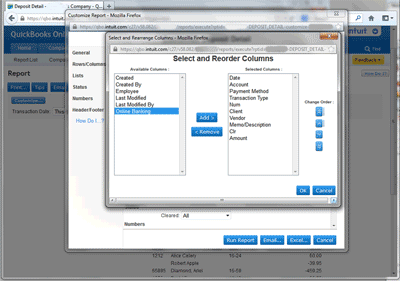
- Click the "Change Columns..." button.
- Add "Account"
- Add "Payment Method"
- Verify that the following columns are included in the "Selected Columns:" list (others will be ignored):
- Date
- Payment Method
- Account
- Transaction Type
- Num
- Client
- Vendor
- Memo/Description
- Amount
- Click "OK" to save the added columns.
- Click "Run Report" to save the changes and rebuild the report.
|
- Click "Memorize..." and give the report a name such as "Qslip Deposit Detail."
- Click "OK" to save the report.
|
Once you have created the custom report, the process for exporting it to a file is as follows:
Export a Deposit Report to Excel
- Create and save a deposit on the "Banking | Deposit" screen.
- Select "Reports | Memorized Reports", select your "Qslip Deposit Detail" report, and click "Run Report."
- Verify that the deposit for which you want to print a deposit slip is in the report. If there are other deposit transactions in the report, that is OK -- Qslip will prompt you to select one upon import.
|
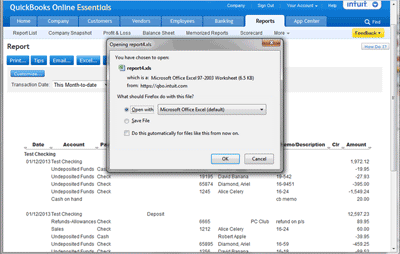
- Click "Excel..." and either have it open directly in Excel, or save the file and open it manually with Excel.
|
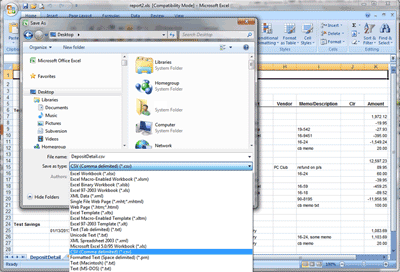
- With the report open in Excel, choose "Save As...".
|
|
If you hover over Save As, a sub-menu will display. Choose "Other Formats."
|
- Change the "Save as type:" to "CSV (Comma delimited) (*.csv)".
- Choose a folder in which to save, from which you will open it in Qslip.
- Name the file however you want. (If you use the same name each time, Qslip can be set to open it each time it starts, assign the correct slip format).
- Click the "Save" button.
|
The Export file has now been created, and you can run Qslip immediately (or later).
Import to Qslip
|
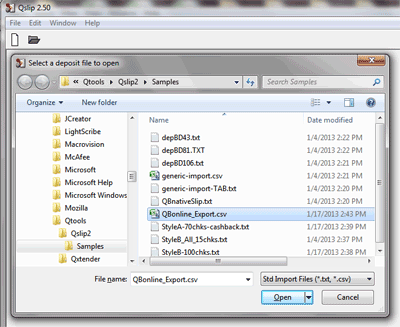
1. Run Qslip. If this is the first time, you will get an open file dialog. Open the file you exported from QuickBooks Online.
Subsequently, when you run Qslip, it will open the last file you imported, skipping this step. (This feature can be controlled in preferences)
You can also open a file at any time while Qslip is running.
|
|
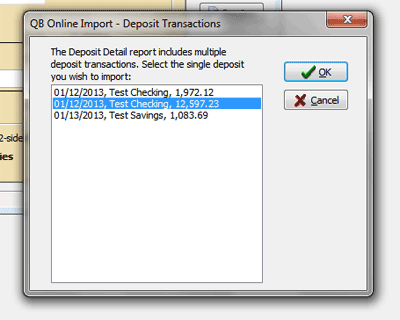
If there is more than one deposit transaction in the imported report, a dialog will display listing each transaction.
Select the one you want and click "OK" to continue.
|
|
2. The file is loaded into Qslip. If this is not the file you exported from QuickBooks Online, select "Open" from the "File" menu or click the and use the dialog to open the file you exported. and use the dialog to open the file you exported.
Any discrepancies in the import file will be displayed in a warning dialog.
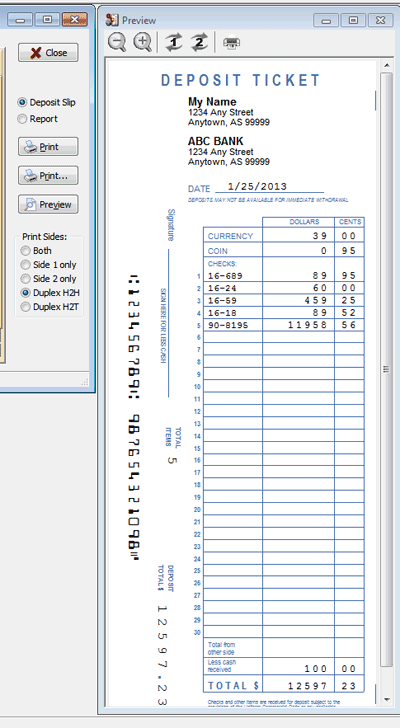
The import stage is complete. Now you can get ready to print a deposit slip.
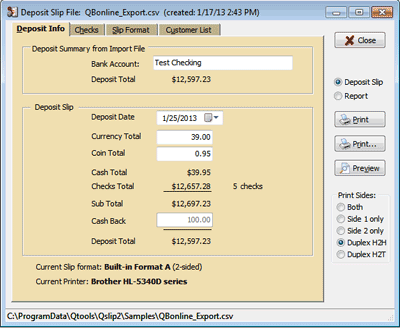
The QuickBooks Bank Account and Deposit Total are shown for reference.
3. Verify Date. You may change the date to when deposit will be made.
4. Verify Cash. Set the currency and coin amounts, if necessary. Editing one will change the other, so that currency + coin = cash total.
5. Verify Slip Format. The current slip format and printer are displayed at the bottom for reference. If not correct, select the proper format.
|
|
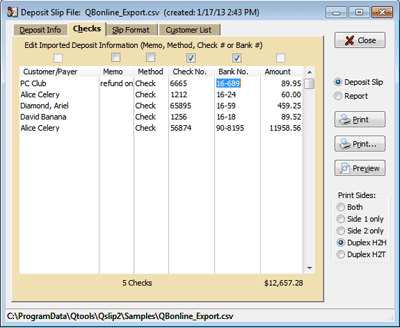
6. Add/Edit item details. (optional) If you haven't entered some or all of the Bank or Check Numbers for the checks in QuickBooks Online, you can enter them now.
|
|