|
|
|
CA - EDD - DE-9/9C Quarterly Report
Usage
|
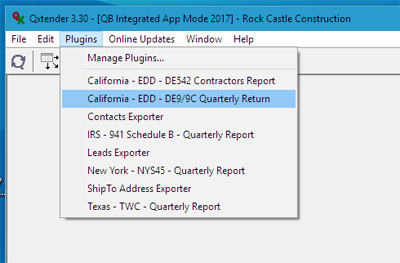
Select California - EDD - DE9/9C Quarterly Return from the Plugins menu of Qxtender.
Version 5 of this Plugin added e-file capability to help you meet the EDD's e-file mandate. See the end of this document for instructions.
You can request a waiver from the EDD if you would like to continue filing on paper, by submitting a form DE-1245W and receiving approval.
|
|
(Export Mode only)
At the first fileopen dialog, select the Payroll Items list report exported from QuickBooks.
At the second fileopen dialog, select the Employee list report exported from QuickBooks.
How to export the list(s) from QB
Or see the Readme file included with the Plugin for details on exporting this file from QB.
|
|
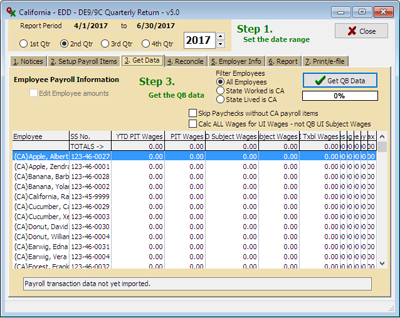
The Plugin opens, initialized with Payroll Item and Employee information.
STEP #1: Set the quarter and year of the reporting period if the default is not correct.
Click on the Notices tab.
Please read the notices on this page.
Internet links are provided in case you need more information to complete and file your return.
|
|
Now, follow the steps indicated on the Plugin.
STEP #2: Click on the Setup Payroll Items tab.
The Plugin will attempt to automatically select the correct payroll item(s). If this does not occur, you can rename the payroll item(s) in QB to match the name(s) shown in the Payroll Items to select box so that they will auto-select in the future.
To manually select the items, using the mouse, drag the indicated Payroll Item(s) from the QB Payroll Items list on the left to the Payroll Items to report list on the right.
You can also select the item and click the button between the lists, or double-click the item, to move it to the Payroll Items to report list.
To delete an item in the Payroll Items to report list, select it and press the Delete key, or click the Trashcan button.
(note: Curly Brackets are used to combine payroll items into a single amount for reporting purposes. The Curly Brackets and the text contained are ignored during calculation. For example, if you select a Payroll Item to report named CA - Withholding and you also have a QB Payroll Item named CA - Withholding {extra}, any amounts for either item will be calculated as one total.)
|
|
STEP #3: Click on the Get Data tab.
All employees in the QB file will be shown, including inactive employees. After processing, employees with no activity during the report period will be removed from the list.
(note: Curly Brackets and the text contained is removed from employee names when printing. This allows you to deal with employees with the same name, or to sort your employee list by using a curly bracketed prefix.)
Click the Get QB Data button.
|
|
(Export Mode only)
A file open dialog will be displayed. Select the "Payroll Transaction Detail Report" exported from QuickBooks.
How to export this report from QB.
Or see the "Readme" file included with the Plugin for details on exporting this report from QB.
|
|
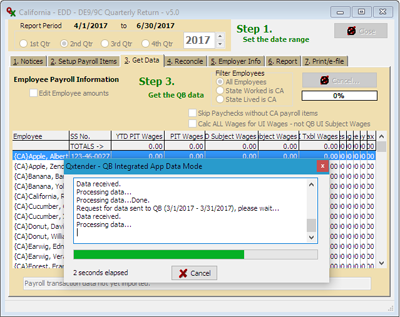
The QB data will be retrieved and processed, filling the appropriate columns with data.
When Qxtender is operating in QB Integrated App Data Mode, a progress dialog will display (as shown).
|
|
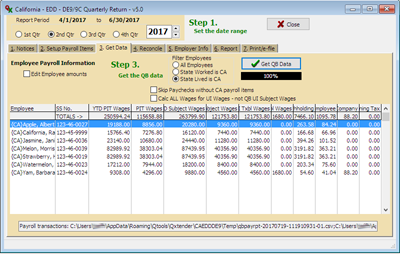
When the data retrieval and processing completes, final calculations are made and the data is displayed.
|
|
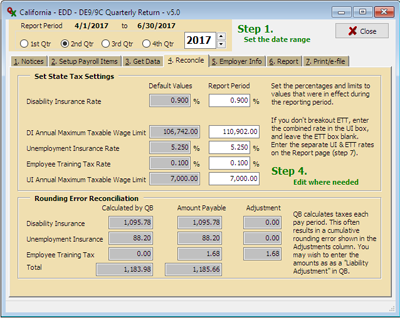
STEP #4: Click on the Reconcile tab.
Verify that the rates and values for the Report Period are correct. Make any necessary changes.
The Reconciliation section compares the amounts calculated by QB and retrieved from the QB data with amounts due based on the Report Period rates and limits. Any discrepancies will need to be corrected in QB.
|
|
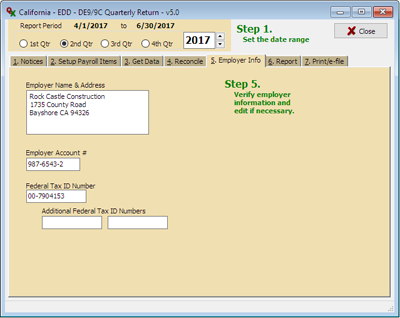
STEP #5: Click on the Employer Info tab.
Verify the Company information and Account numbers.
(Export Mode Only) The first time you use the Plugin, you will have to enter your Employer Name & Address. It will be saved and automatically filled-in thereafter.
|
|
STEP #6: Click on the Report tab.
Verify the dates, rates, and values.
Check any boxes next to special circumstances that apply to this report.
|
|
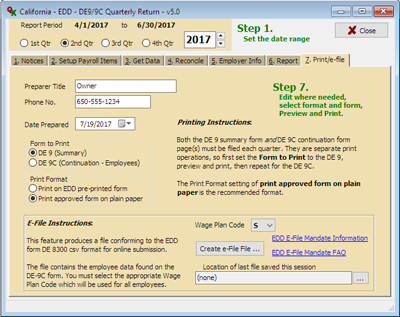
STEP #7: Click on the Print/e-file tab.
Verify the preparer information and date. Change as necessary.
If you are e-filing, use this step to preview and verify the data.
The first time you use the Plugin, you will have to enter your preparer title and phone number. It will be saved and automatically filled-in thereafter.
Select the the Form to Print. The DE-9 summary and the DE-9C employee page(s) are separate print operations.
|
| The first time you use the Plugin, select Print Setup... from Qxtender's File menu to setup your printer. |
|
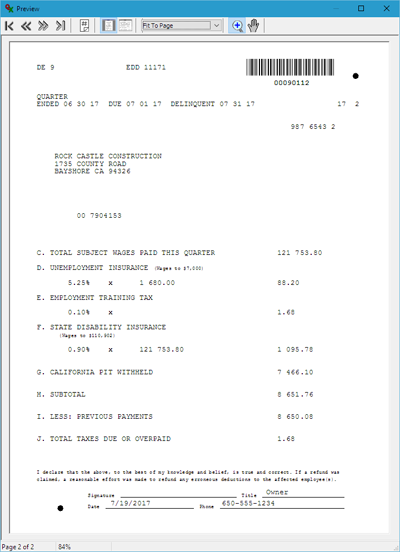
Select the DE 9 (Summary) form as the Form to Print.
Click the Preview button on Qxtender's toolbar (or choose Print Prevew from the File menu).
The first page (not shown here) is an information sheet with instructions for proofing the report and a target mark in the upper left corner to check printer alignment. Be sure to read the instructions on the page after printing the return.
Click the Next button (>>) on the Preview window to view the following page, which is the DE 9 form (shown here).
Verify the information on the report.
Close the preview, then click the Print button on Qxtender's toolbar (or select Print from the File menu) to print the report.
|
|
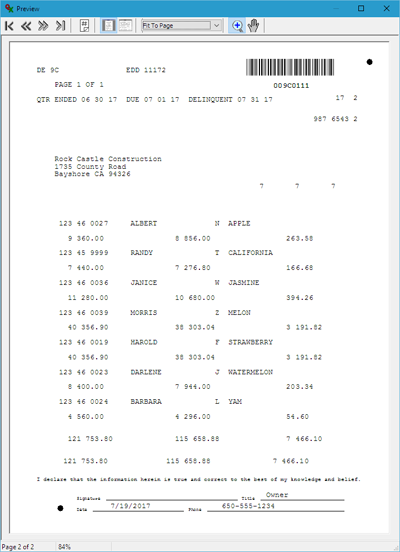
Select the DE 9C (Continuation - Employees) form as the Form to Print.
Click the Preview button on Qxtender's toolbar (or choose Print Prevew from the File menu).
The first page (not shown here) is an information sheet with instructions for proofing the report and a target mark in the upper left corner to check printer alignment. Be sure to read the instructions on the page after printing the return.
Click the Next button (>>) to view the subsequent page(s) containing DE-9C employee continuation pages.
Verify the information on all pages of the report.
Close the preview, then click the Print button on Qxtender's toolbar (or select Print from the File menu) to print the report.
|
|
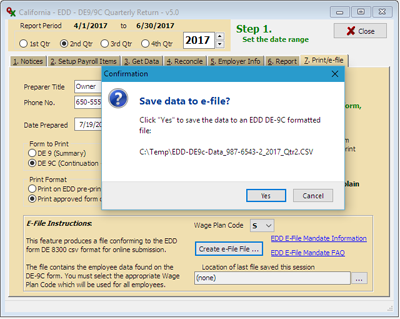
To E-file:
Select the appropriate Wage Plan Code for your employees.
Click on the Create e-file File button.
A file dialog will open. Browse to the location where you wish the file saved. Click Save.
A Confirmation dialog will open, displaying the name and location of the file to be saved.
The file is saved in the EDD form DE 8300 comma separated values (CSV) file format.
|
|
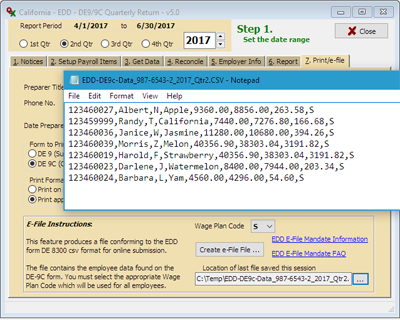
Click on the (...) button at the end of the file name box to open it in Notepad.
Verify the data.
If you need to change any Wage Plan Codes, do that here and save the file from Notepad.
The file can now be uploaded to the EDD on their e-services website.
More information can be found on the EDD website:
EDD E-file Mandate Information
EDD E-file Mandata FAQ
|
|
Copyright Qtools Software - © all rights reserved
QuickBooks, QuickBooks Pro, QuickBooks Premier & QuickBooks Enterprise are registered trademarks of Intuit, Inc.
|
|
|